2019-05-20

Large Stencil Dots #2

A while ago I made another Wrapped Journal, the fourth already.
You can find my other Wrapped Journals HERE & HERE & HERE.

Opnieuw een 'Wrapped Journal' gemaakt, het vierde al.
Mijin andere 'Wrapped Journals' vind je HIER & HIER & HIER.

I die cut the journal cover out of 300 grs watercolor paper using the Eileen Hull Wrapped Journal die. I put the Large Stencil - Dots on top and applied modeling paste through the stencil with a palette knife. I avoided the parts were the fold marks are. After drying I colored the cover with shades of pink, fuchsia and orange paint. Next I added 2 layers of glaze. I mixed Golden Fluid Acrylics Paynes Gray with Golden Glazing Liquid and I applied a layer of that mixture on top of the paint. After waiting a few minutes I wiped away most of the glaze using baby wipes. I repeated that step with white paint.
I stamped randomly on the cover with the Inky Script Background Stamp using StazOn Ink Cherry Pink.

De kaft gesneden uit 300 grs aquarelpapier met behulp van de Eileen Hull Wrapped Journal stans. Daarna met een paletmes structuurpasta opgesmeerd doorheen de Large Stencil-Dots. Op de delen waar de vouwlijnen zitten bracht ik geen structuurpasta aan. Na het drogen de kaft geverfd met verschillende tinten roze, fuchsia en oranje verf. Vervolgens 2 glaze lagen over de kaft geborsteld. Daarvoor eerst Golden Fluid Acrylics Paynes Gray gemend met Golden Glazing Liquid. Dat over het verfwerk aangebracht met een platte borstel. Even gewacht en het meeste weer weggeveegd met babydoekjes. Deze stap nog eens over gedaan met witte verf. 
Tenslotte ook nog hier en daar gestempeld met de Inky Script achtergrondstempel en StazOn inkt Cherry Pink.

I stamped the tulip twice on watercolor paper. I colored the flowers with Distress Ink Ripe Persimmon and Picked Raspberry. After cutting out I glued the tulips to the front cover.

De tulp 2 keer gestempeld op aquarelpapier. Gekleurd met Distress Inkt Ripe Persimmon en Picked Raspberry. Uitgeknipt en op de voorkant van de kaft geplakt.

For the inserts I've cut 20 pages out of mixed media paper, size 19,5 x 11 cm. I folded each page in half and nested 5 pages into each other to make 4 signatures.

Voor de katernen 20 pagina's van 19,5 x 11cm gesneden uit mixed media papier. De pagina's in 2 gevouwen en per 5 in mekaar geschoven om zo 4 katernen te maken.

I've woven pink elastic cord through the holes. I ended up with 4 strips of elastic cord at the inside of the book, these hold the inserts in place.

Roze elastiek door de gaten geweven zodat er aan de binnenkant 4 repen elastiek komen te liggen die de katernen op hun plaats houden. 

This is how the binding looks like along the spine.

Zo ziet de binding eruit op de rug van het boekje.

The glaze layers make the dots stand out more because the blue and white paint gets into all the nooks and crannies of the modeling paste.

De glaze lagen zorgen ervoor dat de stippen extra goed uitkomen. De blauwe en witte verf nestelt zich in de randjes en kleine scheurtjes van de modeling paste.

I painted the reverse side of the cover with pink paint.

De binnenkant van de kaft verfde ik egaal roze.

Stamps Darkroom Door:

Stencil Darkroom Door:

Sizzix: Eileen Hull Wrapped Journal

2019-05-16

Fallen Leaves #4

This is the final card of the 'Fallen Leaves' series I did for Darkroom Door. 

Hier de laatste kaart van de 'Fallen Leaves' reeks die ik maakte voor Darkroom Door.

I did the background using the Polka Dots stencil and lime, pink and orange paint.

De achtergrond maakte ik met de Polka Dots stencil en roze, oranje en lime verf.

On this card I used the Fallen Leaves Texture Stamp to create a pattern on the cup and saucer from the Coffee Time set. The Texture Stamp isn't big enough to cover both the cup and saucer at once so I had to work with 2 prints.
I stamped the Fallen Leaves Texture Stamp twice on white paper using pink paint. I overstamped both prints with the cup and saucer. I've cut the cup out of one print and the saucer out of the other print and assembled it as shown. I used 3D tape to adhere the cup to the card.

De Fallen Leaves Texture Stamp hier gebruikt om een bladmotief op het kopje en de schotel van de 'Coffee Time' set te maken. De stempel was niet groot genoeg om ineens de hele kop en schotel te bedekken dus ik moest in 2 stappen werken. Eerst 2 prints gemaakt op wit papier met de 'Fallen Leaves' en roze verf. Beide prints overstempeld met de kop en schotel. Uit de ene print het kopje geknipt en uit de andere de schotel. Beide weer samengevoegd en het kopje verhoogd opgeplakt.

Stamps Darkroom Door:

Stencil Darkroom Door:

2019-05-15

Large Stencil Dots #1

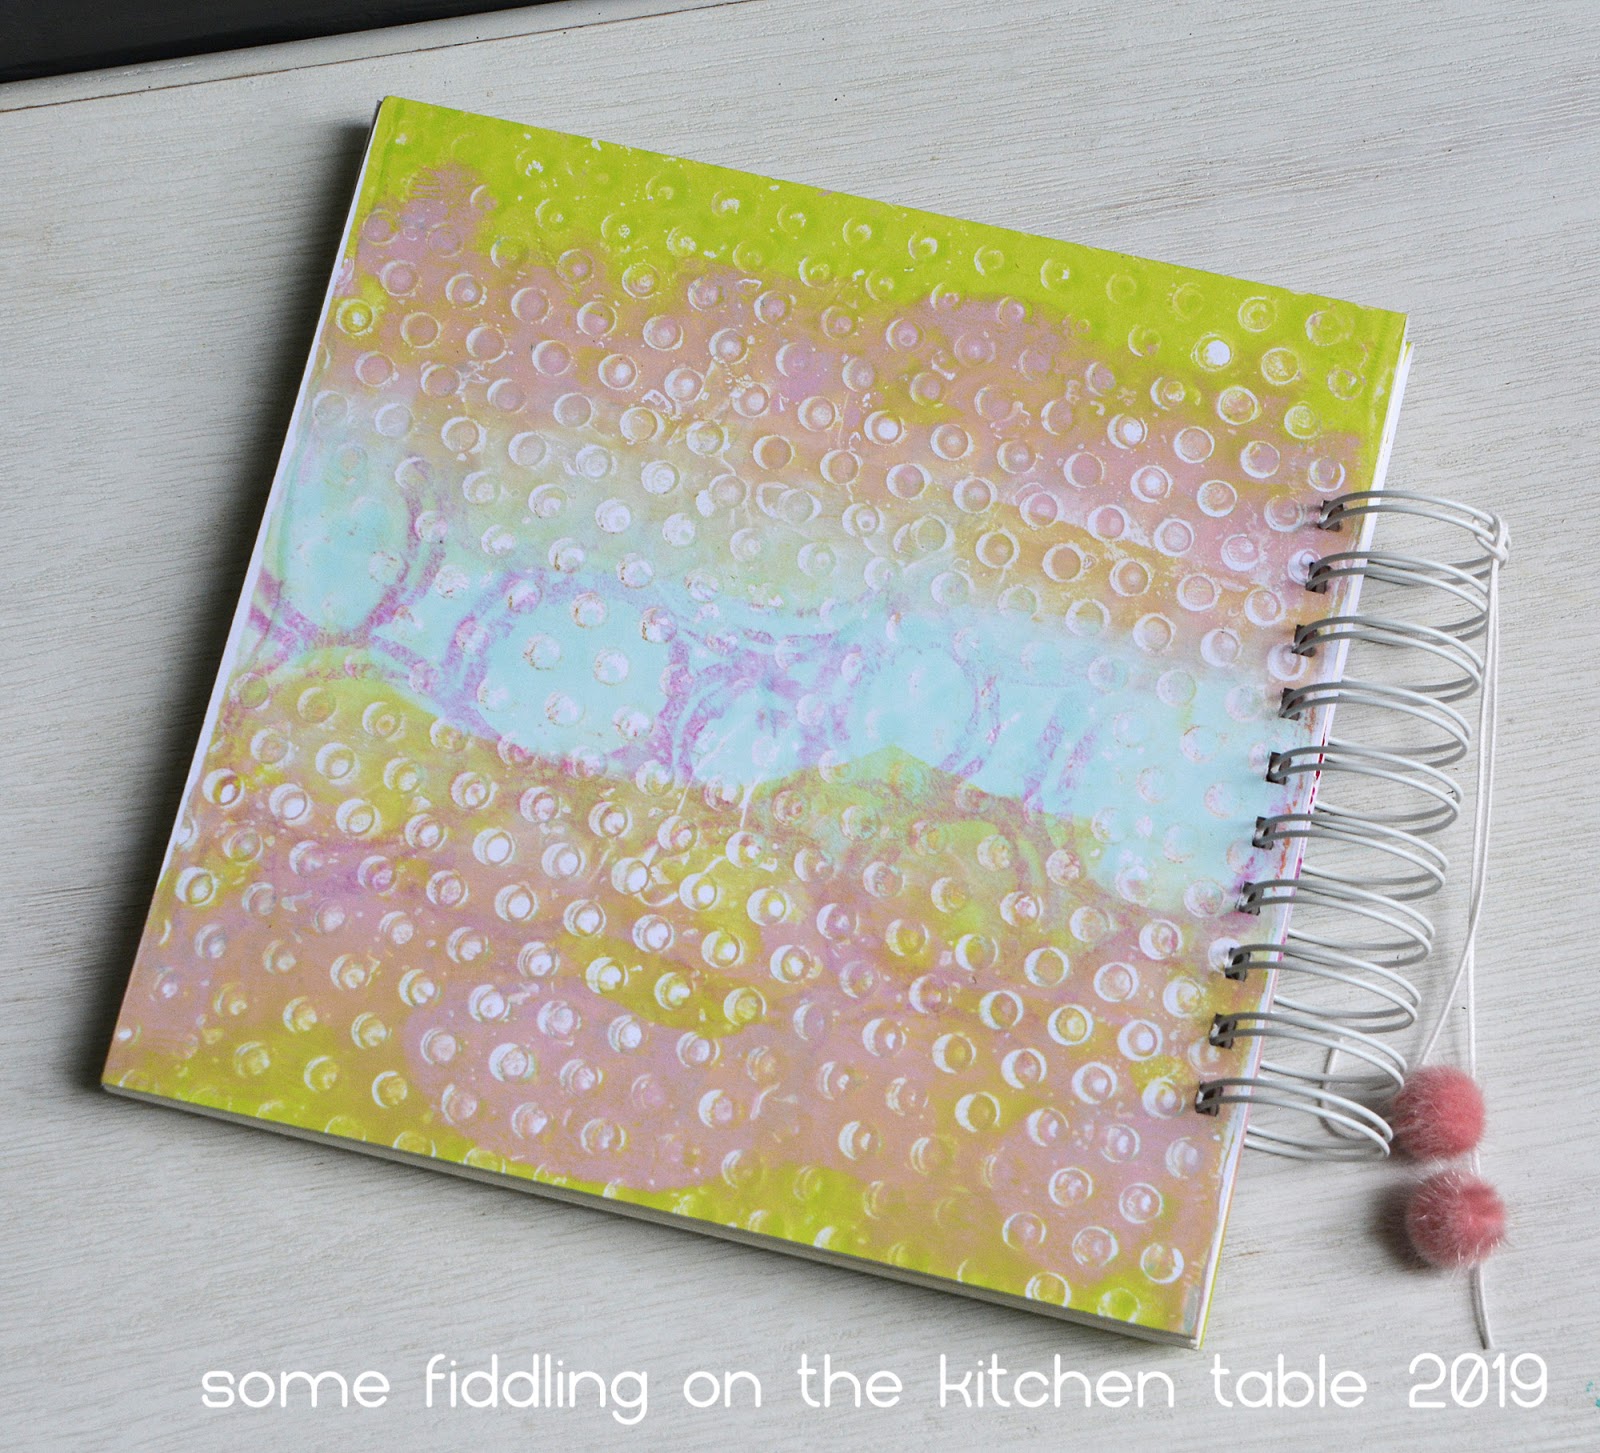
Darkroom Door recently released a large stencil with dots. I was asked to make a few projects with this stencil. I started by creating a spiral bound book. To decorate the front and back cover I used gel prints. Below I added a mini tutorial on how to create those gel prints.

Onlangs bracht Darkroom Door een A4 formaat stencil uit met stippen en ik mocht ermee aan de slag. Om te beginnen maakte ik dit boekje. Om de kaften te bekleden gebruikte ik gel prints. Hieronder laat ik zien hoe ik te werk ging om de prints te maken.

I started by applying stripes of green, fuchsia and pink paint on my large gel printing plate with a brayer. I put the Large Stencil - Circles on top and pulled a few prints for future use. What remained on the plate is what I aimed for as a base for my gel prints.

Begonnen met het aanbrengen van stroken groene, fuchsia en roze verf met een brayer. De Large Stencil - Circles hier bovenop gelegd en een aantal prints gemaakt die ik later ga gebruiken. Wat overbleef op de plaat is wat ik wilde als basislaag van mijn prints. 

After this first layer was touch dry I applied stripes of lime, pink, blue and green on top using a brayer. 
During both steps I cleaned my brayer in between colors by rolling it over a sheet of white paper A4 size. I used this sheet on the reverse of the cover.

Deze laag een beetje laten drogen en daarna opnieuw verf aangebracht in stroken. Opnieuw een brayer gebruikt. Bij deze en vorige stap de brayer tussen het aanbrengen de verschillende verfkleuren gereinigd door over wit papier te rollen. Deze vellen papier gebruikte ik voor de binnenkant van de kaften.

I put the Large Stencil - Dots on top of the paint, covered it with a sheet of paper and rolled over the paper with my brayer to make stencil marks into the paint.

De Large Stencil - Dots op de verflaag gelegd, daar een blad papier op gelegd en er met een brayer over gerold. Deze stap dient alleen om de afdruk van de stencil goed in de verf te drukken. 

After removing the stencil I pulled a print and a ghost print. I used the first print on the front cover. I repeated all steps to make a similar print for the back cover. I glued the prints on 2 panels of 8 x 8" grey board with double sided tape and trimmed the prints to size. I decorated the reverse of the boards with the paper I used to clean my brayer and covered the grey edges of the cardboard with white paint.

Stencil weggenomen en een print en een ghost print gemaakt. Ik werkte voor dit boekje alleen met de eerste print dus alle stappen nog eens herhaald om een gelijkaardige print te maken voor de achterkant van het boek. Beide prints op 2 stukken karton gekleefd van 20 x 20 cm. Ik gebruikte daarvoor dubbelzijdige tape. Het teveel aan de randen afgesneden. De andere kant van het karton bedekt met het papier waar ik mijn brayer op reinigde. De grijze randjes van het karton kregen een laagje witte verf.

I stamped on the front cover with the Inky Script Background Stamp and the Grid Texture Stamp using Distress Oxide Inks Twisted Citron and Broken China.

Op de kaft gestempeld met de 'Inky Script Background Stamp' en met de 'Grid Texture Stamp'. Hiervoor gebruikte ik Distress Oxide Inkt Twisted Citron en Broken China.

To create the flower I sponged through the Large Stencil - Carved Flowers with white paint. Next I added layers of green, lime, pink and fuchsia paint. The white layer is a perfect undercoat for the colors.

Voor de bloem sponsde ik doorheen de 'Large Stencil - Carved Flowes' met witte verf. Daarna voegde ik laagjes groene, lime, roze en fuchsia verf toe. De witte ondergrond zorgt voor levendige kleuren, ondanks de drukke ondergrond.

For the inside pages I cut 25 pages out of mixed media paper, size 8 x 8".

Voor de bladzijden van het boek gebruikte ik mixed media papier. Ik sneed 25 pagina's op maat, 20 x 20 cm.

I did the binding using my Bind-it-All.
I finished the book off with white cord and 2 mini pompons.

Het boek gebonden met mijn Bind-it-All.
Afgewerkt met wit touw en 2 mini pompons.

Stamps Darkroom Door:

Stencils Darkroom Door:

2019-05-14

Fallen Leaves #3

On this card I used the same flower stamp as on the book in my previous post. This time I've made a colorful print. I inked up the stamp using Distress Crayons, sprayed water on top and made a print on watercolor paper. I used my MISTI so I could add several layers. I did the centre of the flower and the stem with Distress Ink Mowed Lawn.
The background of the card was stamped as well. I decorated the top of the card with a strip of washi tape.
I made a faux closure for the card using black and white prints of the Fallen Leaves stamp.

Voor dit kaartje dezelfde bloemenstempel gebruikt als bij het boekje uit de vorige post. Deze keer voor kleur gekozen. De stempel 'beïnkt' met Distress Crayons, daar water over verneveld en de bloem afgedrukt op aquarelpapier. Door met de Misti te werken kon ik verschillende laagjes aanbrengen. Het hart van de bloem en de steel deed ik met Distress Inkt Mowed Lawn. 
De achtergrond van de kaart werd ook gestempeld. De bovenkant afgewerkt met een strookje washi tape.
Met zwart/wit afdrukken van de Fallen Leaves stempel maakte ik een soort van valse sluiting voor de kaart.

Stamps Darkroom Door:

Distress Crayons: Twisted Citron, Ripe Persimmon, Worn Lipstick
Distress Ink: Mowed Lawn
Lawn Fawn Ink: Ballet Slippers
Archival Ink: Jet Black

2019-05-12

Faux Distressed Wood


Last week I made an 8 x 8" book inspired by 2 videos Kate Crane made for Gel Press.
In Video 1 she shows how to make distressed gel prints and in Video 2 she makes book covers with the prints.

Vandaag een boekje van 20 x 20 cm gemaakt, geïnspireerd op 2 lesjes die Kate Crane maakte voor Gelli Arts. In Video 1 toont ze hoe je gel prints maakt met een verweerde look en in Video 2 maakt ze boekenkaftjes met de prints.

I started by making the gel prints. I've cut the gel prints into strips and I machine stitched the strips to a paper backing. I ended up with two 8 x 8" panels.

Eerst gel prints gemaakt. Daar stroken van gesneden en de stroken op een papieren ondergrond gestikt. Zo 2 panelen van 20 x 20 cm gemaakt.

To create the covers I decorated 2 panels of grey board with turquoise handmade paper. I adhered the stitched panels to the outside of both covers.

Voor de kaften 2 stukken grijs karton bekleed met turquoise handgeschept papier. Op de buitenkanten van de kaften de gestikte panelen gekleefd. 

I trimmed 25 pages of white paper to size and used my Bind-it-All to assemble the book.

25 pagina's wit papier op maat gesneden en alles met de Bind-it-All gebonden.

Stamp Darkroom Door: