2017-07-30

Darkroom Door Stencil Blog Hop & Giveaway


Welcome to the Darkroom Door Stencil Blog Hop!
I have an art journal spread to share today, made with the new Darkroom Door stencils. I've created cards as well, I'll put these on my blog later this week. Scroll down to the bottom of this post to find out all about the blog hop and the giveaway. 


Welkom op de Darkroom Door Stencil Blog Hop!
 Vandaag toon ik de Art Journal spread die ik maakte met 2 van de nieuwe Darkroom Door stencils. Ik maakte ook een aantal kaarten, die zal ik later deze week posten. Onderaan deze blogpost vind je alle details in verband met de blog hop en de giveaway.

I worked in my large Dylusions journal. The large stencils have +/- the same size as the pages of this journal. After coating both pages with gesso I applied texture paste through the Large Wildflowers Stencil and the Small Circles Stencil.

Ik werkte in mijn groot Dylusions Journal, de perfecte maat voor de grote stencils. Eerst een laag gesso aangebracht en daarna met een paletmes structuurpasta doorheen de Large Wildflowers Stencil and de Small Circles Stencil gesmeerd.

 I colored the flowers and circles with lime paint. Next I added a mixture of teal paint and glazing liquid to both pages. After a few minutes I removed most of the glaze layer with baby wipes.

Toen alles goed droog was de bloemen gekleurd. Daarna een mengsel van turquoise verf en glazing liquid aangebracht op beide pagina's. Na een paar minuten het meeste van die laag weer weggeveegd met babydoekjes.

I repeated this step with Raw Umber paint. Love how this glazing technique turned out on the circles. 

Deze laatste stap nog een keer herhaald met bruine verf. Bij de cirkels kan je het effect van de glaze lagen heel goed zien.

I adhered green tissue paper randomly and overstamped it with parts of the Numbers Border Stamp using white paint.

Stukjes tissue papier willekeurig opgeplakt en overstempeld met de Numbers Border Stamp en witte verf.

I stamped randomly with the matching Circles Background Stamp as well.

Ook hier en daar gestempeld met de corresponderende Circles Background Stamp.

I stamped parts of the Alphabet Texture Stamp using Archival Ink 'Coffee'.

Delen van de Alphabet Texture Stamp gestempeld met Archival Inkt 'Coffee'.


Now it's time for a giveaway!


Tijd nu voor een giveaway!


Be sure to visit each blog and leave a comment. Five lucky winners will receive 3 stencils of their choice! Winners will be drawn from comments left across all the blogs, so be sure to leave a comment on each blog for more chances to win! Comments received before midnight Friday 4th August (Sidney Time) are eligible to be in the draw. Winners will be announced Monday 7th August on the Darkroom Door blog and Facebook page.

Wie onderstaande blogs bezoekt en een reactie achterlaat maakt kans op een mooie prijs.  Maar liefst vijf bloggers krijgen van Darkroom Door 3 stencils naar keuze. De winnaars zullen gekozen worden via de reacties op de verschillende blogs. Wie overal een reactie achterlaat vergroot dus zijn kans! De giveaway loopt af op vrijdag 4 augustus 16 uur (24u Sidney Time). 
Op maandag 7 augustus zullen de winnaars bekend gemaakt worden op de Darkroom Door blog en Facebook pagina.

Hop along to the other blogs here:

Hieronder de links naar de deelnemende blogs:


2017-07-29

Ton sur Ton

To create the background I started by applying a layer of modeling paste to a card base. I added texture by stamping randomly into the wet paste. After drying I colored the background using Scribble Sticks. 

Eerst met een paletmes een laagje structuurpasta gesmeerd. Daarna textuur aangebracht door te stempelen in de natte pasta. Na droging deze achtergrond gekleurd met Scribble Sticks. 

Stamps
Darkroom Door: Full Bloom Vol 2
Dina Wakley Media: Circle Patterns
Elke Verschooten (text)

2017-07-27

Art Marks #6

I already started filling this art journal with marks.
I made this page for the theme 'curved'. I created the circles by sponging with a blending tool using paint.

Ondertussen al begonnen met het vullen van dit art journal met marks.
Deze pagina maakte ik voor het thema 'curved'. De rondjes deed ik met verf en een blending tool.

For the 'blotted' topic I adhered tape to a page that ended up too busy. 

En hier een beetje vals gespeeld. Voor 'blotted' (vrij vertaald 'uitgewist') plakte ik tape op een nogal drukke pagina.


2017-07-25

Squares #1

I love squares and grid patterns on cards. I have the intention to make a few cards on this topic. To start I painted an irregular grid pattern on a large sheet of paper and cut two cards out of it.

Hokjes, vierkantjes, rasters...op kaarten vind ik altijd tof. Ik ben van plan om een aantal kaarten te maken in dit thema. Om te beginnen onregelmatige hokjes geverfd op een groot blad. Daar 2 kaarten uit gesneden.

I added accents with a white pen and decorated the card with a die cut inlay.

De hokjes aangezet met een witte pen en verder alleen een woord ingelegd.

I used the colored die cut on a white card.

Het uitgestanste woord in een witte kaart ingelegd.

Same technique, another die.

En nog eens hetzelfde gedaan met het woord 'hallo'. 

Stamp & Dies: Els Brigé Design

2017-07-21

Pocket Journal

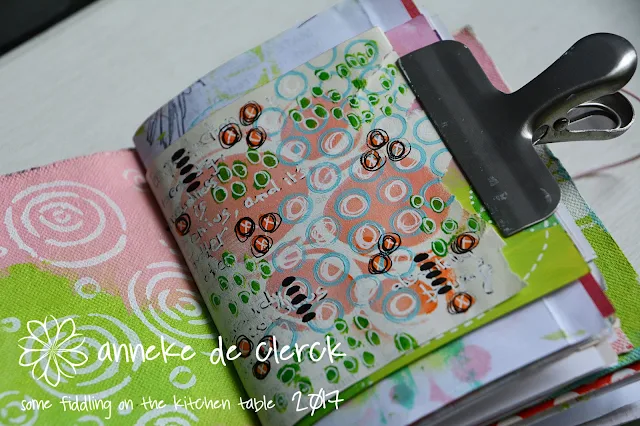
 I was inspired by a mini workshop by Rae Missigman to create this tiny pocket journal. I'm planning to take part in Rae's current artmarks30daychallenge so I have the intention to fill this little journal with lots of marks.

Een klein art journal gemaakt geïnspireerd op een lesje van Rae Missigman.
 Ik ben van plan een paar keer mee te doen met de artmarks30daychallenge die weer lopende is. Het is dus de bedoeling om dit boekje te vullen met heel veel 'marks'.

The booklet measures approximately 4 x 6".

Het boekje meet afgewerkt ongeveer 10 op 15 cm.

For the covers I used cotton fabric.

De kaftjes zijn gemaakt van stevig katoen.

I decorated the spine with a painted branch and lots of ribbon. I colored the ribbon with Distress Inks.

Op de rug een geverfd takje uit de tuin vastgemaakt met lintjes. Ik kleurde wit lint met Distress Inkten.

For the inside papers I used all kinds of scraps.

Gevuld met allerlei papiertjes uit mijn voorraad.

I made a closure using eyelets, ribbon, a branch and some pink elastic cord.

Eyelets, lint, een takje en roze elastiek gebruikt voor de sluiting.

I did the binding of the two sections with a simple pamphlet stitch.

De twee katernen ingebonden met een cahiersteek.

I made a fabric cover for each section as well. 

Elke katern kreeg ook een stoffen wikkel.

The outside cover is slightly smaller than those of the sections.

De buitenste kaft is iets smaller dan de kaftjes van de katernen.

The pages have different sizes, this adds interest to the journal.

Verschillende formaten voor de bladzijden, altijd leuk.

Wax paper with a stamped print on, paper from an old calendar, from FLOW magazines...

Waxpapier met een stempelprint, papier afkomstig van een oude kalender, papier uit oude FLOW magazines... 

Patterned paper, leftover stamped prints.

Gedessineerd papier, restjes gestempeld papier.

These colored pages will help me to avoid "the fear of the blank page".

Voor mijn art journal werk hoef ik niet meer te vertrekken van een witte pagina, dat helpt echt!

I applied several layers of paint to the fabric covers.

De stoffen kaften kregen verschillende lagen verf. 

PaperArtsy Stencil 034 by Kim Dellow
PaperArtsy Mini Masks: PM002, PM006, PM007 by Emma Godfrey
Tim Holtz Layering Stencil: Burlap

2017-07-20

Pink and Lime

Pink and lime, two of my favorite colors!

Roze en lime, één van mijn favoriete kleurencombinaties!

I kept the painted background very simple, just stamped text on top using white paint.

De geverfde achtergrond heel eenvoudig gehouden. Enkel overstempeld met tekst en witte verf.

I adhered a fluffy pompon to the flower centre.

De bloem kreeg een pluizig hart.

Same colors, slightly different outcome.

Voor dit kaartje dezelfde kleuren gebruikt, toch een iets andere uitkomst.

Stamps Darkroom Door

2017-07-18

Hurray

Made this card for a little boy who has turned 2 recently.
The coloring was done with Distress Inks and a waterbrush.

Dit kaartje gemaakt voor een kleine jongen die onlangs 2 jaar werd.
De pinguïn ingekleurd met Distress Inkten en een waterpenseel.

Stamps Els Brigé Design

2017-07-17

Carved Birds

A card for a birthday boy today.
I did the background with paint and stencils.

Een kaartje gemaakt voor de verjaardag van een jongetje.
Voor de achtergrond verschillende kleurtjes verf en stencils gebruikt.

Stamps
Darkroom Door: Carved Birds Vol 1
Art Journey: Hoedje van Papier

2017-07-14

Tissue Paper #2

To create the background of this card I glued 'used' tissue paper on a card panel using matte medium. I stamped flowers on top with white paint.

Deze keer het 'gebruikte' tissue papier met matte medium op een stevig stukje papier gekleefd. Zo had ik meteen een kant en klare ondergrond. Begonnen met het stempelen van bloemen met witte verf.

Next I stamped flowers using Versamarkt Ink and heat embossed them with turquoise embossing powder. I did the coloring with Distress Ink 'Cracked Pistachio'. 

Daarna bloemen gestempeld met Versamark inkt en bewerkt met turquoise reliëfpoeder. De bloemen ingekleurd met behulp van een waterpenseel en Distress Inkt 'Cracked Pistachio'. 

Stamps
PaperArtsy: EEG14
Darkroom Door: Happy Birthday

Aladine: IZINK embossing powder Turquoise

2017-07-12

Inspiration Wednesday 2017 #7

This Inspiration Wednesday lesson was about painting with limited colors. I only worked with dark blue, dark brown and white paint.

Deze Inspiration Wednesday les ging over het leren schilderen met een beperkt aantal kleuren. En dan nog wel donkerblauw, bruin en wit.

Quite a challenge for me. I sketched a vase and tried to add value to the spread by adding dark and light colors. Not as easy as it might look.

Niet meteen mijn favoriete kleuren. Deze spread was voor mij dan ook een hele uitdaging. Vaasje geschetst en diepte proberen aan te brengen door te werken met lichte en donkere kleuren. Niet makkelijk.

Donna paints a flower within 5 seconds, a pleasure to watch.

Donna zet 5 penseelstreken en ze heeft een bloem. Zoiets bewonder ik mateloos .

I had to make a loose painting but I couldn't resist adding some details with a white pen.

Het was de bedoeling om niet te gedetailleerd te werken maar ik kon het toch niet laten om mijn witte pennetje uit te halen :)

While turning the inclusions, you see another flower composition each time.

 Terwijl je de kleine pagina's draait zie je telkens een andere bloem in het vaasje.

And again. That's why inclusions are fun to work with, lots of possibilities.

En nog een keer. Dat is het leuke van die tussenpagina's, er is veel mee mogelijk.

Golden Fluid Acrylics: Titanium White, Paynes Gray, Raw Umber