2013-02-28

Photo a Day #2

 Ziehier het overzicht van mijn 'Photo a Day' project voor de maand februari.

 This is the collage of my 'Photo a Day' project for February.

Op 16 februari werd mijn blog 3 jaar oud. Deze maand bereikte ik ook de kaap van 250 000 pageviews. Ondertussen blijft het aantal volgers en readers maar stijgen (samen bijna 1000!). Reden genoeg om daar eens bij stil te staan en iedereen die hier komt heel hartelijk te bedanken! Ik ben heel blij met elk bezoekje, elke reactie, elke mail! 
Dankjewel!!!

On February 16 I had my third blog anniversary. I also reached the number of 250 000 pageviews this month. The number of followers and readers is increasing daily. So happy for that! Time to say thanks! I'm very pleased with all the visits, the nice comments and emails!
Thank you very much!!!

Wat valt er te verwachten op mijn blog in maart?
Morgen allereerst een nieuwe uitdaging op Art Journey Design Team Blog
Als alles goed gaat komt er ook weer een boekje voor het boekenproject met Dymphie.
 De blikjeskaarten op woensdag zullen een maand moeten wachten want in maart ben ik elke woensdag gast designer op het Amerikaanse blog Eclectic Paperie. Mijn eerste bericht verschijnt daar volgende woensdag 6 maart. Dankjewel Kim voor het aanbod en de leuke spullen waarmee ik aan de slag mag!


What to expect on my blog in March?
To start we have a new challenge at Art Journey Design Team Blog tomorrow. 
I'll make a new book for the challenge with Dymphie as well this month.
 My 'Cards and Tins' item on Wednesday will be postponed because in March I'll be guest designer at the Eclectic Paperie blog each Wednesday. I'll publish my first blogpost there on March 6, so stay tuned :)
 Thanks a lot Kim for asking me and for the lovely goodies you sent me!

2013-02-27

DIY Altered Book with Drawers

Oude boeken een nieuw leven geven, leuk om te doen!

Altering books, a fun job!

Dit zag ik ooit een keer in een oud 'Craft Stamper' magazine: een boek met lades.

Saw the idea of a book with drawers in an old 'Craft Stamper' issue.

Binnenin de lades gestempeld met mijn zelf gekerfde chevron stempels. De materialen van Janine (zie vorige post) in de laatjes gestopt. 

Inside the drawers I did some stamping with my home made chevron stamps.
Put the materials Janine offered me (see previous blogpost) in the drawers.

Voor wie het ook eens wil proberen, ik heb een paar foto's gemaakt van 'the making of'.

 I made some pictures of 'the making of'

1. Drie luciferdoosjes gebruikt als lades. Met een scherp mesje uitsnijdingen in het onderste boekdeel maken zodat de doosjes er net in passen. Niet in de kaft van het boek snijden.
2. De doosjes vastkleven.
3. De pagina's van het onderste boekblok hier en daar aan elkaar vast maken en ook een aantal pagina's over de luciferdoosjes heen kleven. Daarna PVA  lijm strijken aan de randen van het onderste boekblok om alles op zijn plaats te houden.
4. Een rechthoek uit de kaft snijden.

1. I used 3 matchboxes as drawers. Carefully cut away sections of the book with a very sharp craft knife to accommodate the boxes. Do not cut into the back of the book.
2. Glue the boxes in place.
3. Start gluing the back pages together. There is no need to glue every page. Glue a set of pages over the top of the boxes. Glue PVA around the edges of the bottom of the book to make sure everything is secure.
4. Cut a rectangle piece out of the front cover.

5. Met een breekmes steeds gekruiste snedes maken.
6. Zo kan je makkelijk gaan scheuren.
7. De gescheurde opening wordt automatisch steeds kleiner.
8. Restjes genoeg :)

5. Make X-cuts in the pages with a sharp knife.
6. That makes it easy to torn the paper.
7. The opening automaticcaly shrinks.
8. A lot of scraps :)

Na 2 laagjes gesso is het boek dan klaar om te decoreren.

After 2 layers of gesso the book is ready to decorate.

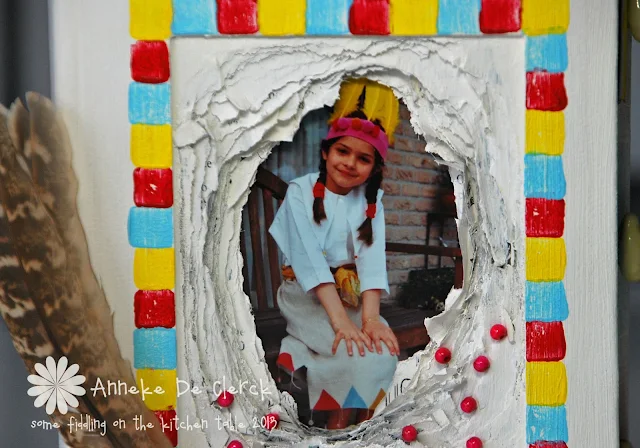
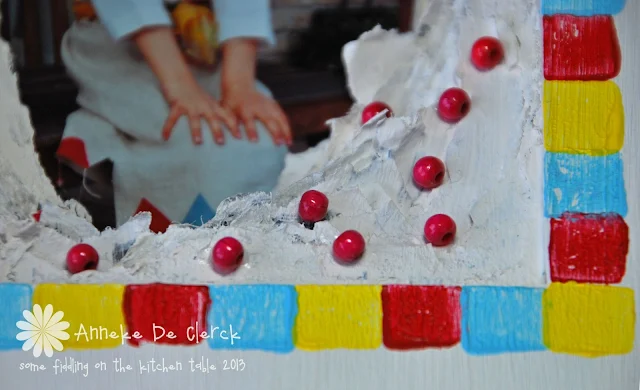
Rond de opening een rij mozaïekjes gestempeld met acrylverf. 

I made a mosaic frame with my home made stamps and acrylic paint.

Achter de opening een foto gekleefd van mijn dochter verkleed als squaw :)
Een fotootje van héél lang geleden...

In the frame I put a photo of my daughter dressed as squaw :)
The pic was made ages ago.

Kraaltjes/Beads


Kapitaalband/headband

Twee vogelveren met een stukje washi tape aan elkaar bevestigd. De laatjes kregen een schelpenkraal als handvat.

Stuck 2 bird feathers together with a piece of washi tape. Glued beads on the drawers.

Meer 'gerecycleerde boeken projecten' van me

More altered book projects of mine

2013-02-25

A Month A Book 9 - Een Maand Een Boek 9

Herinnert iemand zich nog de boekjes uitdaging van Dymphie en mij? In 2011 maakten we elk 8 boekjes voor 'Een Maand Een Boek' en toen zijn we het spoor bijster geraakt. We willen deze uitdaging nu graag hernemen en zijn begonnen met iets wat al héél lang geleden had moeten gebeuren.

I'm wondering if you remember the 'A Month A Book' challenge of Dymphie and me? In 2011 we both made 8 books for this project but last year we've put this challenge on hold. We have the intention to retake it this year. This is the first book, a special one to start with.

Janine daagde ons -eeuwen geleden- uit om een 'Indianenboek' te maken. Ze stuurde ons allebei een envelop met attributen uit een reservaat in Noord Canada: cimu (plantaardige vezel), mineralen, veren, schelpen, een vuursteen pijlpunt....Eerst zat Dymphie midden in een verbouwing, daarna was een tijdje één van de twee enveloppes vermist...Om het kort te houden: veel obstakels op onze weg :) 
Maar ineens waren we er toch helemaal klaar voor!

Our friend Janine challenged us -ages ago- to make a book with Indian theme. She sent us both an envelop with materials from a reserve in northern Canada: cimu (vegetable fibres), minerals, feathers, shells, an arrow point....First Dymphie was in the middle of a house renovation, after that one of the envelopes was missing......To be brief: many obstacles on our way :) 
But suddenly we were ready to go!

Voor de kaft een papiertje gebruikt uit mijn voorraad. Ooit eens gekocht op een boekbindbeurs, het is met de hand geverfd.

 For the cover I used a hand painted paper out of my stash. I bought it some time ago on a fair.


De binding is een variatie op de 'Long Stitch'. Daarvoor heb ik spitjes geknipt in de rug van de kaft. Genaaid met de plantaardige vezels.

The binding is a variation on the 'Long Stitch'. I made some splits in the spine  and used the vegetable fibres. 

 Ter versiering nog wat draadjes geknoopt op de rug.

 I've knotted some threads on the stitches to decorate the spine.

De katernen gescheurd uit crèmekleurig papier.

Used cream paper for the signatures.

 Iedere katern ingepakt in een blad groen papier.

Wrapped some green paper around each signature.

De binnenkant van de kaft beplakt met groen leder. 

Used green leather on the inside of the cover. 

De sluiting/The closure

Een grote platte kraal doet dienst als 'eye catcher'.

A large flat bead surves as an eye catcher.

Nadat dit boekje klaar was had ik nog een heleboel van het materiaal over, daar heb ik nog een boekje van gemaakt. Hier alvast een voorproefje, volgende keer meer...

 I made one more book with the rest of the materials. Here's a little sneak peek, I'll show you the entire book next time...

Ook zo benieuwd als ik naar wat Dymphie met de materialen maakte? 
Kijk dan vlug HIER
Bedankt Dymphie! Leuk dat er dankzij 'Een Maand Een Boek' nog een paar boekjes op stapel staan dit jaar! Iets om naar uit te kijken.
Bedankt Janine voor de mooie materialen en de leuke uitdaging. Zonder jouw had ik mij NOOIT aan een 'Indianenboek' gewaagd :) 
En.....Gelukkige verjaardag Janine!!!

If you want to see Dymphie's take on the challenge, take a  look at her blog HERE
Thank you very much Dymphie! Thanks to 'A Month A Book' there are a few books in the pipeline, I'm glad!
Thank you Janine for the awesome goodies and the fun challenge. Making this book was a pleasure!
And.......Happy Birthday Janine!!!

2013-02-22

Vintage Book Pages 3

Eerst een kader gemaakt met gesso en daarna gestempeld. Mijn favoriete Darkroom Door tulpen stempel kan niet ontbreken in mijn boekje.
Kaarten geef ik meestal weg/stuur ik op, maar dit boekje blijft gewoon bij mij, leuke gedachte :)

This tulip stamp by Darkroom Door is one of my favorites. I just had to use it in my vintage book. Made a frame with gesso before stamping.
 Usually my cards end up with someone else but this booklet will stay with me forever, nice thought!

De stempels beïnkt met Tombow stiften en afgedrukt. 

Did the stamping with my Tombow markers.

Stamps
Hero Arts: C4495 Live Laugh Love

2013-02-21

Forgotten Flowers

Deze bloemen verfde ik al een hele tijd geleden. Ze bleven maar rondslingeren op mijn werktafel. Lang getwijfeld of ik er wel een kaart mee zou maken...

 I painted these flowers last summer. They have been on my work desk ever since. I've been in doubt whether or not I would create a card with it....

Geverfd met ecoline inkt en maskeervloeistof. Niet helemaal zeker of ik dat rommelige resultaat wel mooi vind...

Did the painting with ecoline ink and masking fluid. Not sure if I like the messy look.

Een aantal bijpassende lintjes uit mijn voorraad geplukt.

Picked some matching ribbons out of my stash.

Stamp: Crafts & Things

2013-02-20

Cards and Tins 16

Vandaag een heel simpel kaartje gemaakt voor mijn 'Cards and Tins' reeks.

Today I made a CAS card for my 'Cards and Tins' series.

Ik heb een voorliefde voor blikjes met stippen of ruitjes...

I do like tins with dots and gingham decorations...

Met mijn zelf gemaakt stempeltje hokjes van 1x1 cm gemaakt. De tekststempel heb ik al een tijdje maar had ik nog nooit gebruikt.

To stamp the squares I used my home made stamp. I bought the text stamp a while ago, never used it until now.

Eyelets en een stukje lint.

Eyelets and some ribbon scraps.

Stamps
Different Colors 'SE-00168 Life is not about'
Square: home made stamp

2013-02-18

Snowdrops #1

Een label met lente thema vandaag.
De stippen zijn gestempeld met Distress Stains. De sneeuwklokjes drukte ik af op een restje papier. Ik kleurde ze in met Stains.

Spring on my blog today!
I made the dots on this tag with Distress Stains. Used Stains to color the snowdrops too. 

Allerlei lintjes en touwtjes gecombineerd.

I combined ribbon and bakers twine to decorate the tag.

Twee bloemetjes en een lintje doen dienst als topper.

Used two flowers and some ribbon for the tag topper.

Stamps:
Darkroom Door Background Stamp 'Polka Dots'

Distress Stains: Tumbled Glass, Broken China, Evergreen Bough, Shabby Shutters.

Ribbon: Marianne Design, Tilda
Flowers: Prima

2013-02-17

Leen & Steven

Leen -ons nichtje- en Steven trouwden gisteren. 
Ik maakte dit kaartje om het jonge paar te feliciteren.

I made this card for Leen -our niece- and Steven. They got married yesterday.

Ik maakte al eens een kaartje in deze stijl 

I made a similar card before

Op een witte kaart eerst een paar rijen hartjes afgedrukt met mijn zelf gekerfde hartjes stempel. Dit bedekt met een laag wit vellum. De twee lagen aan elkaar vastgemaakt door middel van stiksels.

On a white card I stamped some hearts with my hand carved heart stamp.
Put a layer of white vellum on top. Attached the two layers to each other with some machine stitches. 

Vijf hartjes uitgeponst en bedekt met een laagje imitatie bladzilver.

I covered some punched hearts with a layer of silver leaf.

Stamps
Oxford Impressions: 'My Story' (love)
Hand carved stamp (heart)


2013-02-14

Vintage Book Pages 2

Vandaag kon ik niet anders dan een hart maken in mijn vintage boekje :) 
Het patroon voor het hartje haalde ik HIER.

On Valentine's day I had to make a heart in my vintage book :)
 For the shape of the heart I used a free template CLICK.

Regenboogkleuren.

Rainbow colors.

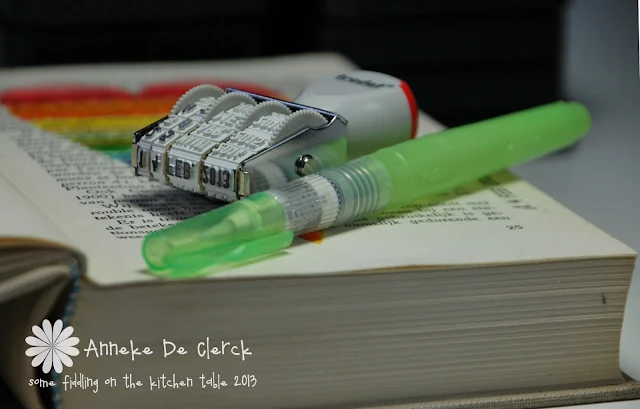
Geverfd met heel veel kleurtjes Distress Inkt en dit waterpenseel.

I painted with Distress Ink and this water brush.


2013-02-13

Cards and Tins 15

Weer een kaartje gemaakt voor mijn 'Cards and Tins' reeks.

Made another card for my 'Cards and Tins' series.

Het begint natuurlijk met het uitkiezen van een blik. 

It all starts with choosing a tin out of my collection.

Dit keer koos ik een groot exemplaar. Ik bewaar er een deel van mijn restjes in.

I keep some of my leftovers in this extra large tin.

Daarna passende stempels uitzoeken....

Step 2: looking for appropriate stamps...

...en dan kan ik aan de slag. 
De stippen zijn geëmbossed met Seafoam White embossingpoeder. Daarna het papier gekleurd met Distress Inkt 'Evergreen Bough'.

...and then I'm ready to start. 
I heat embossed the dots with Seafoam White embossing powder. Colored the background with Distress Ink 'Evergreen Bough'.

De cirkel gekleurd met verschillende kleuren Distress Inkt (craft sheet/water techniek). De takjes gestempeld met Archival Inkt 'Coffee'.

I colored the circle with Distress Ink (craft sheet/water technique). Stamped the branches with Archival Ink 'Coffee'.

Vogels en besjes gekleurd met Distress Inkt en een waterpenseel. Tenslotte nog een randje parels gekleefd en een paar stoffen bloemetjes gekleurd en opgeplakt.

Colored the birds and the berries with Distress Ink and a water brush. Added beads and fabric flowers to finish it off.

Stamps
Hero Arts: Cling Dots CG189
Crafty Individuals: CI-193 (birds)
Penny Black: Winter Berries 4273K