Pages

2012-02-29

Give Away & News

Ik wil deze schrikkeldag gebruiken om jullie allemaal te bedanken voor het trouw bezoeken van mijn blog en voor alle lieve commentaren. De reacties op de kaartjes uit mijn vorige post waren overweldigend. Daar ben ik echt heel blij mee. Dankjewel allemaal ♥

 I think leap day is a fine day to thank you all for visiting my blog so often and for commenting so frequently. On my previous post I received so many sweet comments, that truly makes me happy! Thank you so much ♥ 

Ik heb 2 aankondigingen te doen vandaag. 

I have 2 announcements to make today.

1. Mijn blog is deze maand 2 jaar geworden. Tijd om eens een enkele keer stil te staan bij de 'cijfers'. Ik ben echt heel blij met alle volgers en readers. In totaal al zo'n 600! Bijna 130 000 pageviews ook. Reden genoeg om te vieren dus!

1. This month I had my second blog anniversary. Time to look at the facts & figures for once. I'm so glad with all my followers and readers, almost 600 by now! Soon I'll reach 130 000 pageviews as well, wow! Time to celebrate!

 Ik wil dan ook graag dit boekje weggeven. Gewoon een reactie achterlaten en het kan van jouw zijn. Er is tijd om te reageren tot 10 maart. Op zondag 11 maart maak ik de winnaar bekend. Misschien valt er ook nog wel een troostprijsje uit de lucht :)
Update:  bij anonieme reacties graag een naam onder het bericht plaatsen als je een kans wilt maken!!!

On the occasion of my blog anniversary I'm giving this book away. Just leave a comment and it could become yours! Time to comment until March 10. On Sunday March 11 I'll announce the winner. There is a chance I'll have some consolation prizes as well :)

Handgemaakt, koptische binding, stevig glad papier. 

Handmade, coptic binding, firm smooth paper.

De koptische binding zorgt ervoor dat het boek mooi vlak openvalt,  ideaal dus om in te schrijven, te tekenen...De afmetingen zijn 12,5 op 17,5 cm.   

Because of the coptic binding, the book 'opens flat'. Great for writing, drawing, journaling.... The book measures 5 by 6"


2. En dan heb ik nog heel leuk nieuws!!! Louise van Art Journey heeft mij gevraagd om lid te worden van haar design team. Een onverwachte vraag, dat had ik niet zien aankomen! Ik vind het een hele eer om voor dat mooie stempelmerk te mogen werken en heb dan ook ja gezegd. Een nieuwe en spannende uitdaging waar ik wel zin in heb! Bedankt Louise!


2. I have some great news as well!!! Louise from Art Journey asked me to become a member of her design team. So unexpected, never thought this would come my way! I'm flattered and honored of course. It's all very exciting but I'm looking forward to start! Thank you so much Louise!


2012-02-27

Quick & Easy #1

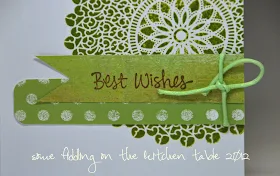
Ik ben aan een paar reeksen quick & easy kaartjes bezig. Hier de eerste reeks.

I'm busy making some quick & easy cards. Here the first series.

Een stempelafdruk...

Some stamping...

Een paar stukjes papier en een wens...

Some scraps and a sentiment...

 Een eindje koordje...

A piece of cord...

Klaar!

Finished!

Stamps
Hero Arts: Starbust Lace S5317
Darkroom Door: Full Bloom Vol1 (sentiments)

2012-02-24

Picadilly

 Heel veel rondjes geponst voor dit kaartje. De motiefjes komen uit de Picadilly papierlijn van Basic Grey "Farm House". Een vrolijk papiertje waar ik met plezier eens mijn stempels voor liet staan :)

I punched out a lot of circles for this card. I used the Picadilly paper collection by Basic Grey 'Farm House'. I love that Farm House paper, don't mind there are almost no stamps involved here (for once :)).

De lentekleurtjes gecombineerd met kraft.

Combined the patterned paper with kraft paper.

 Een randje gemaakt met de naaimachine. 

Made a frame with my sewing machine. 

De wens paste uiteindelijk niet op de voorkant, die kwam binnenin.

The sentiment didn't suit on the front of the card, I put it inside the card.


Terwijl ik toch aan het stikken was deze slinger gemaakt. Misschien komt die nog wel eens op een kaart terecht.

I made a garland of circles and flowers. For a future card perhaps....

Stamp
Darkroom Door: Full Bloom Vol1

2012-02-23

Stamp Carving #7

In de Stamp Carving 101 lessen leerden we een klein handgeschreven woordje kerven. Ik koos het woordje 'happy'. Op dit label heb ik het woord gecombineerd met chipboard kleefletters.

During the Stamp Carving 101 lessons we learned how to carve one little handwritten word. I chose the word 'happy'. For this tag I combined the word happy with some chipboard stickers.

Een goeie oefening op dunne en gebogen lijnen. En nu zie ik pas dat de stempel ondersteboven ligt :)

An exercise in thin lines and curves. Now I see the stamp is upside down :)

Strepen getrokken met verschillende kleuren Distress Stains. Mijn tag heb ik gestanst uit aquarelpapier. Daarop gaan de kleuren veel mooier in elkaar overvloeien dan op gewoon papier.

I made the colored stripes with Distress Stains. Punched the tag out of watercolor paper. The colors blend perfectly well on that kind of paper.

Het kreuklint kleurde ik ook met Distress Stains.

I colored the ribbon with Distress Stains too.

Chipboard Stickers by Basic Grey

Daarna ook nog het woordje  'book' gekerfd in een iets 'vetter' lettertype. Ik kijk al jaaaaren jaloers naar de 'boek' stempel van Dymphie. Mijn inspiratie voor dit woord komt dus helemaal bij haar vandaan. 

I also carved the word 'book' in a bolder font. For this word I was totally inspired by Dymphie. She carved the word 'boek' ages ago (look) and she uses it often on her book projects.

Hier een bestempelde strook papier rond één van mijn handgebonden boekjes gewikkeld.

I stamped the word 'book' on a strip of paper and wrapped it around one of my handmade books.

Stamps
'happy' & 'book': hand carved
Hero Arts: G4917 Dandelion 

Distress Stains: Dried Marigold, Peeled Paint, Shabby Shutters, Bundled Sage, Tumbled Glass, Weathered Wood, Broken China.

Archival Ink: Coffee


2012-02-20

Snowdrops

 Een paar sneeuwklokjes uit de tuin gehaald en er een kleine fotoshoot mee georganiseerd :)

Organized a fotoshoot with some snowdrops from my garden :)


Eentje bewerkt met een texture van Kim Klassen.

For this photo I used a texture by Kim Klassen 

Een digitaal gescrapte pagina voor mijn Photoshop Friday boekje.

A digital page for my Photoshop Friday booklet.

Template: Jessica Sprague

2012-02-19

Pour l' Amour du Scrap

Gisteren heb ik met Ine de scrapbookbeurs 'Pour l'Amour du Scrap' bezocht in het Franse Rijsel. Bijna naast de deur voor ons. Er waren een hele rij grote namen afgezakt naar Rijsel om er workshops te geven. Wij volgden er een workshop bij Rachel Greig van Darkroom Door.

Yesterday my daughter Ine and I visited a show for scrapbookers 'Pour l'Amour du Scrap' in Lille, France.  A lot of artists from all over 'the world' came to this event to give workshops. We joined a workshop given by Rachel Greig from Darkroom Door


De workshop was tot in de puntjes voorbereid. Rachel is een fantastische lerares. De workshop ging over technieken met Distress Inkt.

The workshop was perfectly prepared! Rachel is a terrific teatcher. The workshop was about Distress Ink techniques.

We maakten 4 kaarten.

We made 4 cards.

Voor deze kaart werd de 'crayon resist' techniek gebruikt.

For this card we used the 'crayon resist' technique.

Heel leuk om met zoveel verschillende mooie stempels te mogen werken.

We could use a whole bunch of awesome Darkroom Door stamps, great to work with!

Deze kaart is gemaakt met Distress Stains.

For this card we used Distress Stains.

Naast de kaarten kregen we elk ook nog wat filmstrips en een tekststempel.
Aan het einde van de workshop hield Rachel nog een loterij en won ik de fotostempel met de taart. Lucky me :)
Dankjewel Rachel!

We went home with 4 cards, some filmstrips and a Darkroom Door text stamp each.
At the end of the workshop Rachel organised a lottery and I won the 'Birthday Cake' photostamp. Lucky me :)
Thans again Rachel!


2012-02-16

Stamp Carving 101 #6

In les 6 van Stamp Carving 101 van Julie Fei-Fan Balzer leerden we een damask stempel gutsen. Ik maakte er 2 labels mee.

During lesson 6 of Stamp Carving 101 by Julie Fei-Fan Balzer we learned how to carve a damask stamp. I made 2 tags with my new stamp.

 De achtergrond gestempeld met Distress Inkt en de 'Plaid Background' stempel van Darkroom Door. Hierop de damask stempel afgedrukt met StazOn watervaste inkt. Daarna wat water verneveld over het geheel. 

I stamped the 'Plaid Background' by Darkroom Door with Distress Ink and the damask stamp with StazOn water resist ink. Sprayed some water over the surface afterwards.

 De Darkroom Door achtergronden zijn net een tikje te klein voor het grote label van de Tim Holtz ' Tag & Bookplates' mal. Een reepje washi tape onderaan verbergt dat :)

The Darkroom Door background stamps are too small for the big Tim Holtz tag from the Tag & Bookplates die. A strip of washi tape at the bottom of the tag is hiding this :)

Hier gestempeld met de 'Harlequin Background' stempel van Darkroom Door. De cijfers zijn van Art Journey (numbers).
Het Hero Arts tekstrondje op een ribkartonnen cirkeltje gekleefd.

Here I stamped with the 'Harlequin Background' stamp by Darkroom Door. The numbers are by Art Jouney (numbers).
 Glued the Hero Arts text on a circle of corrugated cardboard.

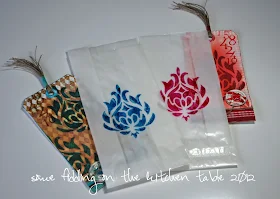
Glassine zakjes bestempeld met dezelfde stempel. Leuk inpakmateriaal voor de labels.

Stamped some glassine pockets with the same damask stamp. Makes nice packaging material for the tags. 

Resultaat van de lessen en wat vrij werk. Nog 4 lessen te gaan....
Een superleuke cursus, echt een aanrader!

 These are the stamps I carved until now. Still 4 lessons to go....
I'm really enjoying this online class! 

Het lesforum van Stamp Carving 101 blijft toegankelijk voor 'eeuwig'. Je kan ook blijvend invoegen als nieuwe leerling.
 Bij elke les hoort een video. Geen saai en langdradig filmpje maar 'to the point' instructies. Je leert er echt alle tips en trucs ivm stempels gutsen. Interessante algemene info over Julie's lessen vind je hier.

If you take an online class from Julie, you have acces forever. You can join any of the classes at any time. Each lesson of Stamp Carving 101 is accompanied by a video. No boring videos but to the point instructions. Julie is a wonderful teacher. She teaches her students all the tips and tricks about carving stamps.
For more information about her online classes, click here. 


2012-02-14

Art Journey Challenge #18

Een mannenkaart in regenboogkleuren. Dat is de uitdaging voor de Art Journey challenge #18.
Dit kaartje is mijn inzending.

A man's card in rainbow colors. That's the theme for the Art Journey challenge #18.
This card is my entry. 

Het woord 'congrats' gestempeld met veel verschillende kleurtjes Distress Inkt.

I stamped the word 'congrats' with different colors Distress Ink.

Dit idee nog eens herhaald voor een wenskaart ter gelegenheid van een geboorte. Versierd met washi tape hartjes.

Used the same background for a card for a new born baby. 
Decorated the card with hearts made of washi tape.

Stamps Art Journey:
 Gorgeous Kids & Pen Nib

2012-02-13

Canvas:The Tutorial

Hieronder toon ik aan de hand van foto's hoe ik deze canvas maakte.

Below a tutorial on how I made the background of this canvas.

Ik startte met het kleven van verschillende groene papierstrookjes op het canvas. 

I stuck several torn pieces of green paper on the canvas first.

Vervolgens verfde ik de randen en maakte de scheurrandjes van het papier groen. Ik deed dit met 2 kleuren groene acrylverf.

Then I started painting the edges of the canvas with 2 different colors green acrylic paint. Added some paint to the torn edges of the paper too.

Daarna spatte ik wat druppels ecoline over het canvas (groen en paars). Door wat te bewegen met het doek krijg je mooie 'druppels'  die ook over de randen heen lopen.

Sprayed some ecoline ink on top of the canvas (green and purple) and moved with the canvas to distribute the ink droplets.  

De ecoline inkt vormt een mooi patroon.

The ecoline ink makes a nice pattern. 

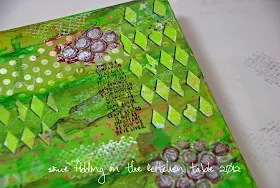
Dotjes aangebracht met een contrasterende kleur acrylverf en sequin waste.
De ruitjes zijn gemaakt met een template en structuurverf.

Made some dots with a contrasting color acrylic paint and sequin waste.
 Made the harlequin background with a template and molding paste. 

Hier en daar gestempeld met Memories Black. Over de zwarte stempelafdrukken nog een keer gestempeld met gesso (behalve over de tekst) om de kleuren weer wat te vervagen. De structuurverf ter hoogte van de ruitjes bewerkte ik met groene acrylverf en de dots met gesso.

Did some stamping with Memories Black. To fade the colors a little bit I stamped again with gesso (except the text). Added som green acrylic paint to the harlequin background and some gesso to the dots. 

Ook op de randen heb ik gestempeld.

Did some stamping on the edges too.

De finishing touch: schaduw aanbrengen en wat doodling hier en daar. Dat vind ik persoonlijk het moeilijkste onderdeel :)

The finishing touch: adding some shadow and doodling here and there. In my opinion, that is the hardest part :)

Bloemen gestempeld op tekstpapier met StazOn en uitgeknipt.

Stamped the flowers on text paper with StazOn and cut them out.

Klaar!

Done!

In één moeite door ook een label gemaakt. Helemaal op dezelfde manier gewerkt.

Made a tag at the same time. Used the same technique as for the canvas.


Stamps:
Stampers Anonymous: Tim Holtz Collection 'Bitty Grunge'
Flower, leaves and stem: hand carved stamps

Inkpads: 
Memories Black
StazOn: Fuchsia Pink, Cactus Green, Blazing Red, Pumpkin

Acrylic paint Amsterdam: Violet, Brilliant Green, Yellowish Green
Ecoline ink: Pastel Violet 579, Green 600

Gesso, Molding Paste

Template The Crafters Workshop: Mini Harleqiun
Sequin Waste/Punchinella